If you haven’t figured it out by now, I love me some chocolate chip cookies. Call me a purist, call me boring…I love plain ol’ chocolate chip cookies. For most of my life, I’ve stuck with the standard recipe on the back of the Toll House Chocolate Chip bag (with some slight modifications…see this post). But, something happened that made me want to stray and try new recipes. Life is crazy like that. 😉
Frontier Airlines serves warm chocolate chip cookies on every flight. Did you know that? Dane and I took Frontier on a trip to somewhere that I can’t remember, but I’m willing to bet that it was either California, Minnesota, or New Mexico since those are three place we flew to in the last year. Anyway, we ate the cookies and couldn’t believe how amazing they were. Blame it on the altitude, blame it on the fogginess of waking up at an ungodly hour to catch a flight…blame it on what you want, but those cookies were good…like make-you-start-thinking-about-changing-your-chocolate-chip-cookie-recipe good. We began to dissect the flavors of the cookie as we ate them and I realized that there must be shortening in them. They were chewy, but had a slight crunch…an amazing slight crunch.
When we got home, I searched the interweb and found a recipe by Crisco. I tried it and I was not disappointed. This recipe will make some darn good cookies. But, I do have some complaints. Mainly, my complaints about this recipe encompass things that relate to my OCD behavior. For instance, the recipe calls for 3/4 cup of Crisco…which leaves me with 1/4 cup of a Crico stick that I have absolutely no use for…annoying. It also doesn’t use an entire bag of chocolate chips…Dane has no complaints about this because he likes to eat the extras. 😉 Lastly, it only makes 3 dozen cookies. Not, that I ever actually get 5 dozen cookies out of a traditional toll house batch, but after Dane and I eat our share of cookie dough, it really only makes a little more than 24 cookies…which were subsequently eaten within a day and a half. I guess this isn’t actually a horrible thing now that I think about it. 😉
Anyway, now that I’m done complaining, here’s the recipe!
Ingredients:
- 3/4 stick Butter Flavored Crisco (or 3/4 cup butter flavored shortening from tub)
- 1 1/4 cups packed light brown sugar
- 2 tablespoons milk
- 1 tablespoon vanilla extract
- 1 large egg
- 1 3/4 cups flour
- 1 teaspoon salt
- 3/4 teaspoon baking soda (I used a full teaspoon)
- 1 1/2 cups chocolate chips
(the original recipe can be found here. I made some slight modifications.)
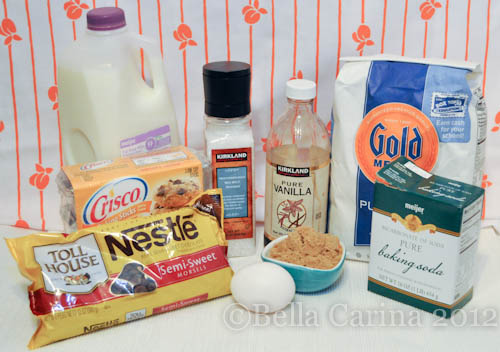 I know what you’re thinking…”milk mixed in with the cookies? No white sugar? What trick are you trying to pull here, Karen?” But, you’re just going to have to trust me on this one…it makes one darn good cookie.
Oh, and one thing to note…shortening has gotten a bad rap in the past with all this talk of trans fats and what not, but they changed their recipe and it now has zero trans fats. Not that this makes crisco a super food, but that may put your mind a little more at ease. 🙂
The nice thing about Crisco is that they put the recipe in the package for you (it’s slightly different than the one online actually, but it has the same essentials).
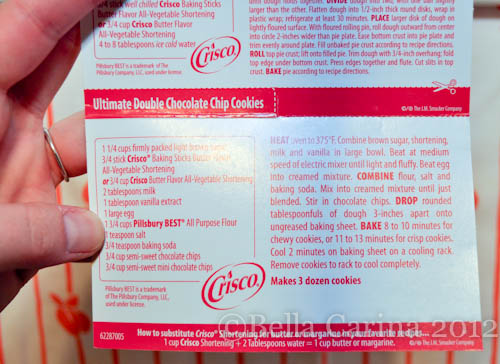 One thing I really like about this recipe is that it has a ton of brown sugar…
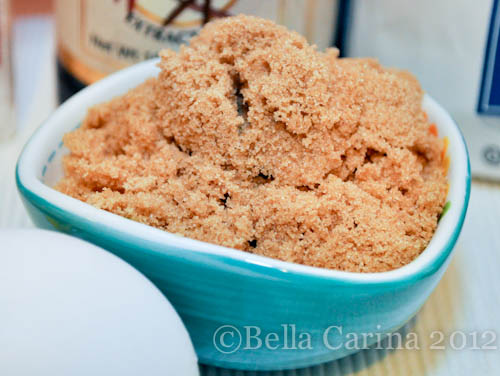 That’s usually one of my modifications of the regular toll house recipe…add more brown sugar, so that was already done for me.
To start this recipe, be sure to preheat your oven to 375 degrees. Cut the stick of crisco at the 3/4 cup mark using a sharp knife.
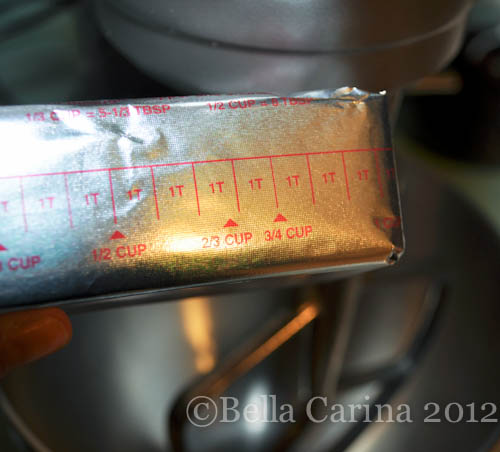 Even though I have no use for that extra 1/4 cup of shortening, I saved it anyway just in case I find a use for it in the future…does that make me a hoarder? Hope not.
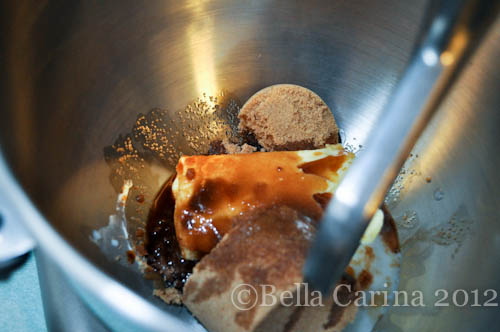
In my stand up mixer I added the shortening, sugar, milk and vanilla. (Another thing I like about this recipe is that it doesn’t mess around with the vanilla. It calls for a full tablespoon! My kind of recipe!)
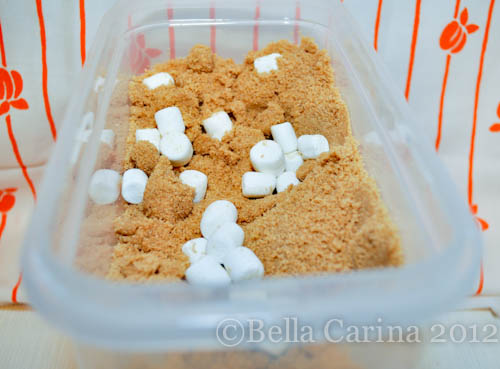
 Because I love all of you so much, here’s a tip I picked up along the way. Toss some marshmallows in with your brown sugar stash to keep it from getting hard. Don’t say I never gave you anything. 😉
 Back to baking…next I creamed the ingredients on medium until it was light and fluffy looking.
 Scrape down the sides with a spatula if needed (I needed to). The recipe says to combine the dry ingredients in a bowl before adding it to the creamed mixture. I’m lazy so I just added the flour in two portions and tossed the salt and baking soda in with it.
 Which brings me to my next complaint (lots of complaining for a cookie recipe I love, huh?). The original recipe calls for 3/4 teaspoon of baking soda. I don’t know anyone who has a 3/4 teaspoon measure and I sure don’t and since I’m lazy (as established above) I didn’t want to measure out the baking soda twice, so I just tossed a whole teaspoon in…I know what you’re thinking…”Karen is such a rebel…she’s crazy.” I know…it’s true…I am both a rebel and crazy. 😉
Once the dry ingredients were well combined, I added the chocolate chips. I used semi-sweet, but sometimes I use milk chocolate…just kinda depends on my mood.
 With my cookie scoop I quickly got the dough to fall into a respectable formation on my silicone baking mat atop a cookie sheet. I love that I don’t have to clean the cookie sheet…especially after all that work I put in getting it sparkling clean (see how to clean your cookie sheet to make it shiny and new here).
 The recipe gives two cooking times. 8-10 minutes for chewy cookies and 11-13 for crisp. I’m a chewy on the inside, crispy on the outside girl so I cooked mine for 9 minutes and they came out just the way I like them.
 I’m telling you…these cookies are really good. I rarely bust out a glass of milk for cookies unless they are of the oreo variety, but these cookies called for a nice cold glass of milk.

 The shortening helps them to not spread out quite as much as they do when I make them with butter.
 So, these cookies taste good and look good!
Now, don’t get me wrong, this will never replace my beloved modified toll house recipe, especially when it comes to cookie dough eating, but this recipe is officially in my chocolate chip cookie recipe rotation. I may work on modifying the amounts of ingredients to be able to use a whole stick of crisco…it just seems like the right thing to do. 😉
Now, for those of you that have been reading for a while, you may remember that I made my own vanilla extract back before Christmas. You may have also noticed that I’m still using my Costco vanilla extract. That’s because I haven’t used the homemade batch yet! Oops…the big taste test is next on my agenda…rather, it is on the agenda somewhere. I’ll try to get to it soon!
Have any of you branched out and tried a new recipe for something that you love? Have any success? Or did it just make you realize that your tried and true recipe was the way to go?


