Spring Cleaning Comes Early

I have some news to share!  2012 is a big year for us, indeed.  Dane and I are moving to Washington DC!  After Dane finishes school at the end of March, he will be starting a job in Virginia and we are very excited for the new adventures that this move will bring!  After I finished my degree (Masters in Business) last August, I applied to several jobs in the area here in Dayton, Ohio without much luck.  That was really what spurred me on to get this little blog going in the first place.  So, although the last six months of blogging and working on my photography business has been awesome, I also hope to find a real legitimate job that actually provides some cash flow to our little family.  Turns out blogging isn’t exactly paying the bills right now and with a wedding to pay for and Roman’s mouth to feed (and, boy, does he eat a lot), money would be a good thing. 😉

{image from here.}

We actually went house hunting last weekend and think we found a place that we are really going to love renting!  We thought about buying a home, but after much deliberation, we decided that renting was the best choice for us at this point in our lives.  In general, I don’t like change.  The move from California to Ohio was a pretty tough transition for me, but I’m trying to keep a good attitude and finding an awesome home definitely helps with that!  Virginia is so different from Ohio.  There are waaay more people, lots of diversity, and lots of other things that living near a big city brings (good and bad).  I’m no stranger to that growing up very close to Los Angeles, but it’s amazing how I have adapted in the last year an a half to the slower pace of living in the Midwest.  But, as I said, Dane and I are up for the adventure, so bring it on East Coast!

The history nerd inside of me is also really excited to live near a city with so many museums that are F-R-E-E to go to!  That area of the country has so many cool sights to see and we’ll only be a train ride away from cool cities like NYC and Philly.  And I can’t wait to see the cherry blossoms bloom!

{image from here.}

With all of this talk of moving to new places comes packing up our home.  Which leads me to the title of this post.  Spring Cleaning is coming a little early here at house of DK in preparation for the move.  The first thing that I’ve been working on to move towards this is cleaning out the kitchen.  In an attempt to not be wasteful, I’m getting creative and using up all kinds of things that we have in our freezer and pantry.  So far, I’ve managed to use all of our meat stock that we had in the freezer, several cans of beans and soups, and a variety of pastas among other things.

So, as I was perusing the pantry the other day, I came across a half empty box of Crispy Rice cereal and half a bag of marshmallows left over from our last s’mores making night.  Ding!  Ding!  The light bulb went off and I knew what I had to make.  That night, I literally had a dream about eating Rice Crispy Treats.  :)  The next day I went at it.

First, I measured out the cereal and realized that I only had enough for a half batch (3 cups).  Which ended up working out just fine on the marshmallow end because I only had half a bag there as well.

First, I put two tablespoons of butter and the marshmallows into a sauce pan over low heat.  I probably had about 20 marshmallows.

Stir constantly until the marshmallows are all melted.

Turn off the heat and pour in the crispy rice.
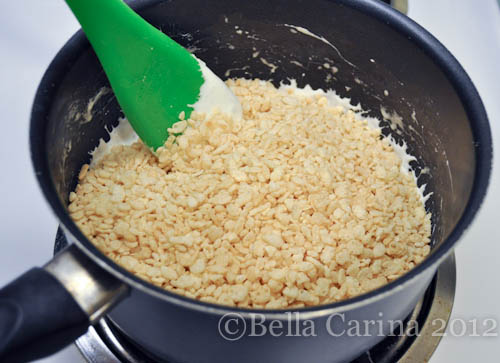
Stir it all up until there’s marshmallow-y goodness on every piece of cereal.
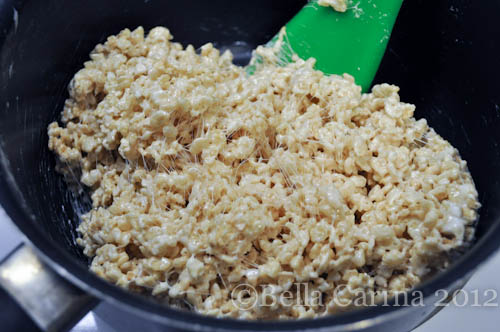
Then transfer it to a baking pan sprayed with non-stick spray.  Here’s my tip for the day: spray some non-stick spray on the back of a spoon to smooth everything out nice and flat.
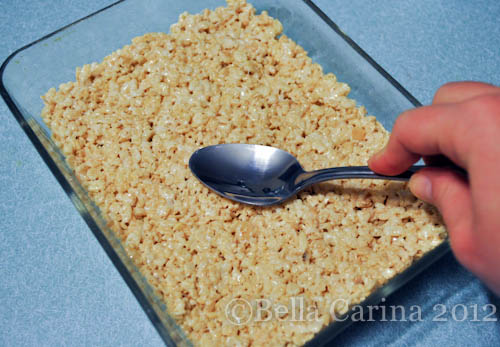
I searched my pantry for some fun rainbow sprinkles, but didn’t have any.  Feel free to spice up your treats with sprinkles or chocolate chips or even some food coloring (everyone loves green colored desserts for St. Patty’s, right?).

Rice Crispy Treats are such a fun, easy, and yummy…well…treat. :)  Dane was one happy boy when he came home from school to these.
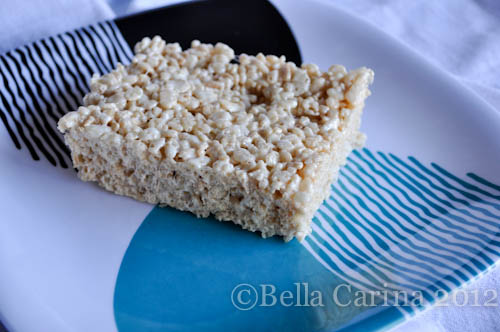
Have you started any spring cleaning?  Made any interesting meals trying to clean out your pantry and freezer?  Any tips for moving to our nation’s capital?  I’m all ears.

Posted in Food, Life | Tagged , , , | 1 Comment

Molten Chocolate Cake with Ice Cream

So, this is actually quite an exciting day for me. This is my 100th post! When I started this little blog of mine, I made a goal to write 100 post before New Year’s…ok, so maybe I met my goal a little late, but I reached it all the same and it’s pretty exciting! This molten chocolate cake recipe was slated to come up next and I contemplated writing a different post to commemorate this moment, and then I said to myself, “self, you love chocolate, and you love blogging about dessert,” so it’s actually perfectly appropriate that a special post like this would include both! Thank you so much to all of you, my wonderful readers, that make blogging worth my while. I’ll keep blogging as long as you keep reading!

;

After I decided that I was going to make the Engagement Chicken for Dane and myself on Valentine’s Day, I wanted something amazing and delicious to follow it up for dessert. I had a couple requirements…one was that it had to include chocolate…two is that it had to be amazing. I came across this recipe for Molten Chocolate Cake on The Pioneer Woman’s blog, which is actually originally from here at Tasty Kitchen. Lava cake is one of those desserts that I always have to order when I see it on a menu at a restaurant, so I figured it was worth a try to see if I could make it myself!

I’m going to be honest here…this did not turn out exactly as planned. Although it still came out delicious, there may have been some yelling and swearing and the threat of throwing the cake across the room…I’ll get to that later. 😉

I ended up only having a half a cup of powdered sugar in my pantry when I went to make this, so I made half of the recipe. This was fine, because it was the perfect amount for two people.

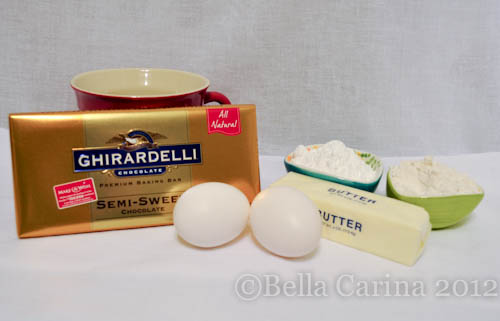
Here’s what you’ll need to make this:

  • 2 ounces semi-sweet baking chocolate (I splurged and got Ghirardelli)
  • ¼ cup butter
  • ½ cup powdered sugar
  • 1 egg
  • 1 egg yolk
  • 3 tablespoons flour

In case you didn’t know, the “gh” of Ghirardelli is pronounced with a hard g as in “gear” as opposed to a soft g which is pronounced more like a j as in “George.” An “h” after a “c” in Italian does the same thing; it makes it a hard c as in the word bruschetta. It should actually be pronounced “bru-sket-a” even though it is commonly pronounced “bru-shet-a” here in the good ol’ U-S of A. There’s a little Italian lesson for ya. All those years of Italian classes in college and a semester living in Rome really paid off. 😉 This recipe is actually pretty easy to make and I’m sure you’ll be shocked to know I didn’t use my stand up mixer for this one. All you need is a microwave safe mixing bowl and a whisk.

I waited to make this until we were all done eating our dinner so that they came out all lava-y and molten-y…and yumm-y. 😉

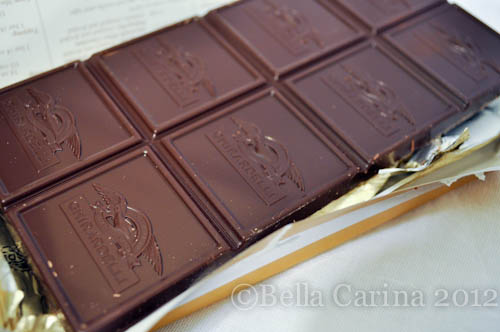
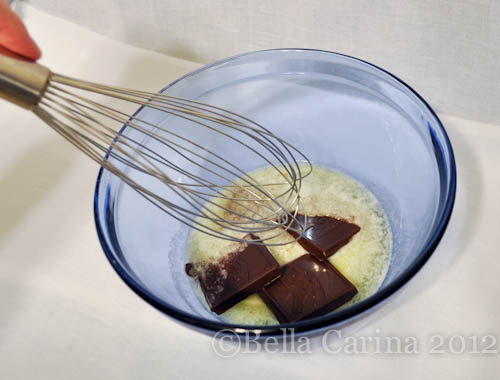
The Ghirardelli squares are actually only a 1/2 ounce each. Most baking chocolate comes in 1 ounce squares, so just make sure you check your package. I used 4 squares of chocolate, which is 2 ounces.

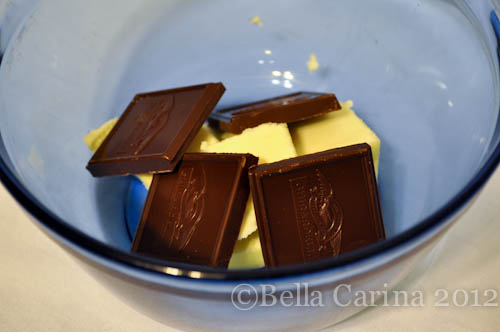
In a glass mixing bowl, I added the butter and chocolate. Cut the butter into smaller pieces to help it melt faster.

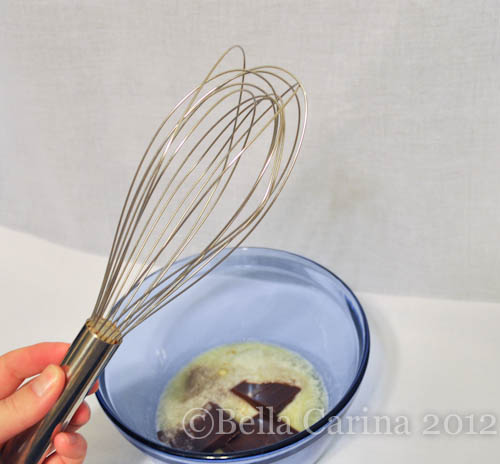
Microwave the butter and chocolate just until the butter is melted and get out your whisk. I would start out with 15 or 20 seconds and see if it’s melted. Our poor whisk is a little wonky after it got into a fight with our drawer. :( Dane couldn’t figure out why the drawer wasn’t opening…we found out a little too late that it was because the whisk was in the way.

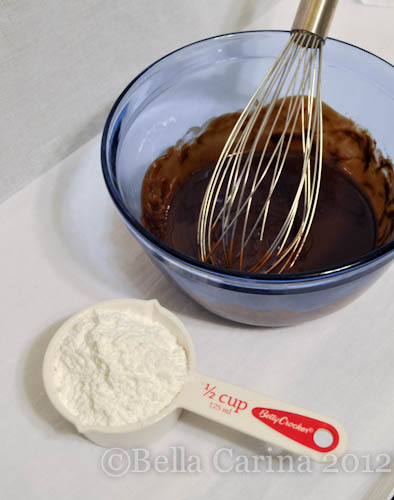
Luckily, it still works fine. Use the whisk to mix up the melted butter and chocolate.

Mix it until all the chocolate melts and it is smooth. You can also do with using a double boiler, but as long as you don’t over microwave it, the microwave method is fine. As you are stirring, it may seem like the chocolate is never going to melt, but after I kept stirring it eventually all did. Have your powdered sugar measured out.

Then, whisk in the powdered sugar.

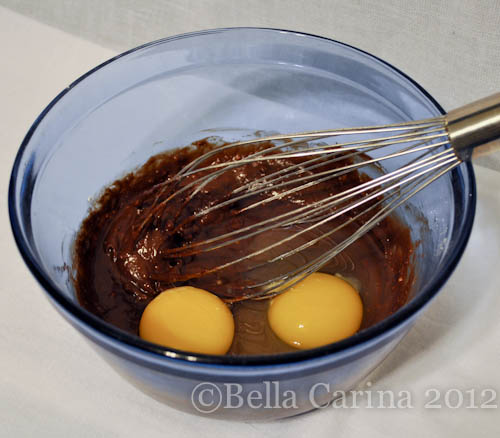
Next, add one whole egg and an extra egg yolk. I use the “crack the egg and carefully pour the yolk back and forth until all the white is gone” method. (You can see photos of that in this post.) Whisk the both the whole egg and the yolk in.

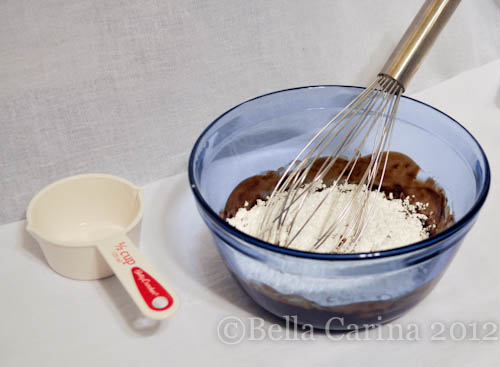
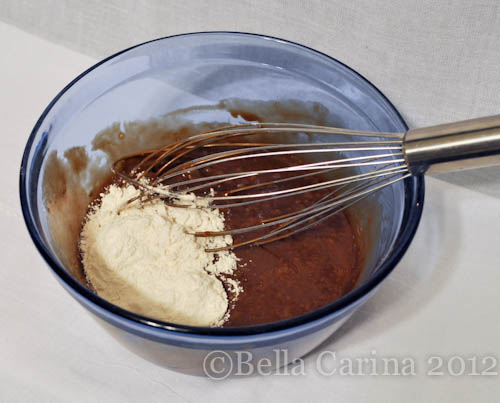
Next, add the flour and stir until combined.

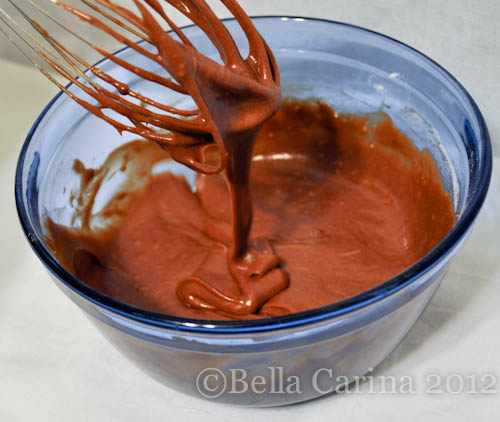
The batter should be about the consistency of brownie batter.

The recipe says to use ramekins to bake the cakes. Not wanting to have to buy anything new, I went into my cupboards and came up with these.

One small ramekin (who knows where the second one is, but I know it’s somewhere in the house) and this large cup that I use for french onion soup. I figured it was worth a try! So, I doused them both with non-stick cooking spray hoping the cakes would easily pop out when done…key word being “hope.”

I filled them both with batter.

The recipe says to bake for 13-14 minutes. The cake should start to pull away from the sides when it is done. That never really happened for me on either cup and the big one took a lot longer than 14 minutes to cook. I wish I had kept track of the time, but, alas, I did not. My tip would be to check it every minute or so after 13 minutes until the top looks completely cooked. See how the small one looks cooked, while the large one is still gooey? I took out the small one and left the big one in for a while longer. (The recipe said to put them on a cookie sheet, btw.)

I followed Pioneer Woman’s instructions on placing a plate upside down over the ramekin.

And then flipped it. Be careful because those ramekins are toasty!

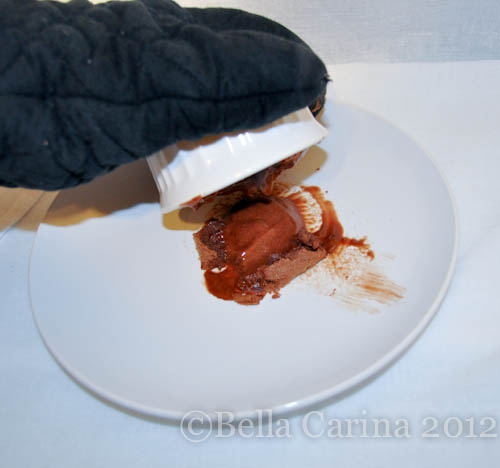
And this is what happened…waaa…waaaa.

Even more frustrating was that the oven mitt was so bulky that I dropped the ramekin several times trying to get the cake to come out. Not only was it loud when it hit the plate, but there was chocolate oozing out all over…not so good for presentation. I actually ended up scooping it back in a baking it a little while longer. After Dane heard enough swearing and yelling, he took a break from thesis writing to help and came up with the genius idea of using a knife to loosen the sides of the cake. (This was one of those “duh” moments on my part…guess I was too frustrated to think of a simple idea!)

And then he flipped it. The cake popped right out. The same method worked for the smaller one as well and all was right in the world again.

I had purchased some french vanilla ice cream to go with this yummy dessert. The recipe suggests real whipped cream which I’m sure would be amazing as well, but I just didn’t feel like making it. (I spent all day roasting a chicken, ok?)

I love that Kroger named it “French Vanilla Magnifique” haha. It was pretty delicious actually. After all the frustration this was the perfect end to the night. It was super yummy!

Although, I wish it had turned out as pretty as the picture on the recipe’s website. I think next time I would probably bake them in the larger cups and just scoop the ice cream right on top.

Anyone else have an easier recipe for lava cake? Maybe this is just one of those desserts I should leave to the experts. Or, I guess I just need to make this more often to get more practice!

Posted in Food | Tagged , , , , , , | 2 Comments

Engagement Chicken

About a year ago, I was chatting with my bestie, Jenna, and we were talking about new recipes to try.  She told me that her husband’s favorite thing that she makes is Ina Garten’s Roast Chicken.  It’s called “Engagement Chicken” because it will make your man want to get down on a knee and propose after one bite.  :)  Now, I can’t say for sure that this is why Dane proposed, but he sure loved it and that’s why I decided to make it for him this Valentine’s Day.

Prior to when I made this a year ago, I had never roasted a chicken.  I assumed it would be a lot of work (having made a turkey before), but this honestly isn’t that bad.  The hardest part for me is getting over the whole having to clean a whole chicken thing.  I prefer to have my meat look nothing like the actual animal…haha.  But, since I love Dane, I put on my big girl pants and stopped whining and went ahead and made this for us.  :)

When I made this for Valentine’s Day, I googled “Ina Garten Roast Chicken” and came up with this recipe, which is the one that I made a year ago and the one that I made the other night.  In preparation of writing this post, looked up “Ina’s Engagement Chicken” and came up with a different recipe…similar, but not the same.  The second is actually called Engagement Roast Chicken, whereas the first is Perfect Roast Chicken.  I’m sure both are amazing and since I even ended up slightly modifying the recipe, this post is really just going to be on how to roast a chicken in general.  (If you were wondering, the Engagement Chicken adds a sauce whereas the first is just the roast chicken.)

To make this, you’ll need:

  • one whole roasting chicken (4-5 lbs)
  • one bag of baby carrots
  • one large sweet onion (or white onion)
  • one lemon, halved
  • one head of garlic, cut in half
  • bunch of fresh thyme
  • 2 tablespoons butter, melted
  • salt and pepper
  • olive oil
  • kitchen string

Kitchen string (or twine) is one of those things that you never think to buy until you need it…and then you can’t find it.  Last year when I made this, I skipped the string and it came out fine.  You can usually find it pretty easily around Thanksgiving, so if you happen to see some at the store, I’d pick it up.  It’s pretty useful for things like roasting chickens and tying up fresh herbs…and apparently asparagus according to the picture.  Hmmm…I can’t think of why I would ever tie up asparagus.

A huge roasting pan like I have is not necessary to make this, in fact, I ended up burning most of my onions and some of my carrots because they weren’t covered by the bird.  Epic fail on my part (because I LOVE the roasted onions and carrots from this dish), but I didn’t think about that at the time and was excited to make use of my roasting pan that I’ve only used one other time.  I would suggest using any pan that fits the chicken, but isn’t too much larger than it…does that make sense?  You’ll want it to be deep enough to fit all the veggies, too.

The onions and carrots act as a sort of rack in when you bake your chicken in a smaller pan and plop it on top of the veggies.  Live and learn, right?

Anyway, back to the recipe.  Preheat your oven to 425 degrees.  Then, get to chopping.  I sliced the onion and halved the lemon and garlic head.  Depending on the size of your bird and your lemon, you may want to quarter the lemon.

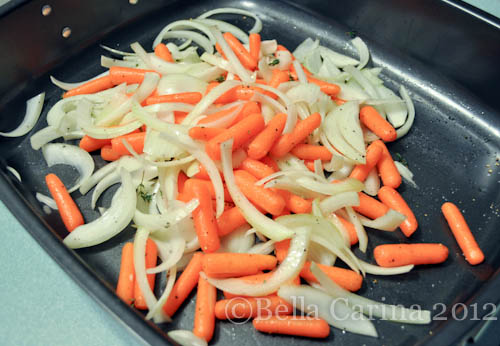
If you use whole carrots instead of baby carrots, just make sure you chop them to a consistent size.  In your roasting pan, toss the onions and carrots with some olive oil (a couple tablespoons), salt and pepper, and thyme.  If you are using fresh thyme, pinch the stem of thyme at one end.  Then pull it through your pinched fingers to remove the leafy part.  Toss the stems in the trash.

Ina suggests also adding chopped fennel to this little party, but I’m not really a fan.  You can also get creative here and add some other veggies to the mix.  If you plan on adding a heartier veggie like potatoes that may take slightly longer to cook, I would suggest roasting them in a separate dish.

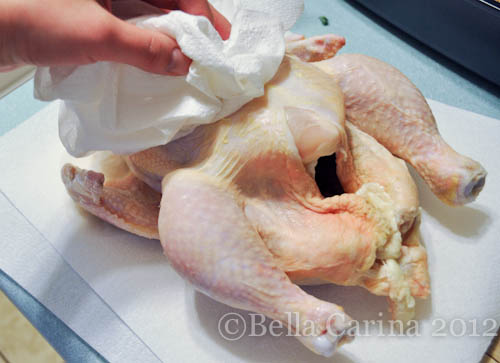
Now for my favorite part (can you hear the sarcasm through the computer?)…rinsing the bird.  Unwrap the chicken and remove the bag of giblets from the neck cavity.  I’m sure my mom would keep these and cook something with them, but it grosses me out so I throw them in the trash.  Now, rinse the whole chicken and be sure to fill up both cavities and dump the water out.  Use paper towels to pat the bird dry.

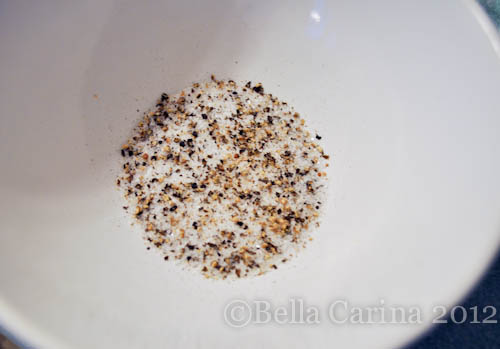
To season the chicken, I grind a bunch of salt and pepper from my grinders into a bowl so I don’t contaminate my bottles of salt and pepper by switching back and forth from handling the raw chicken to grinding the spices.

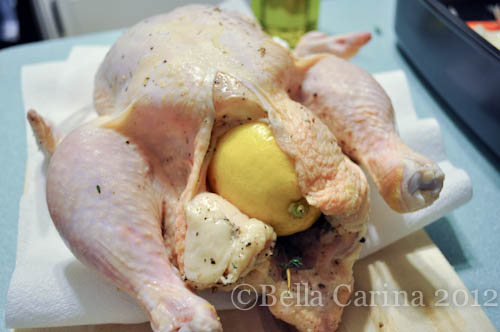
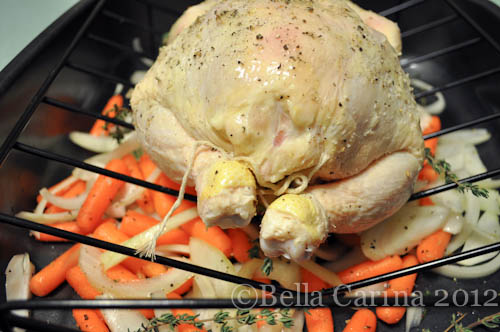
Then, I use my hands to rub the mix of salt and pepper on the inside and outside of the chicken.  Next, it’s time to stuff ‘er.  You’ll want to fit a bunch of thyme, the two halves of garlic, and all the lemon inside.  It’s going to be a little tight…just do your best.

Once it’s stuffed, use your kitchen string to tie the legs closed.  I just use a kind of figure eight type deal and then knot it…be creative. 😉

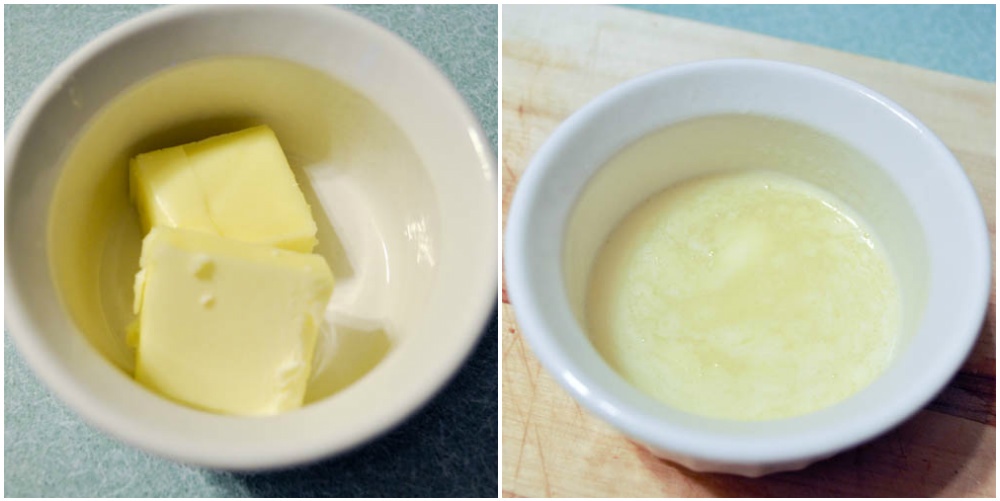
Place the bird in the roasting pan breast side down and tuck the wing tips underneath the body.  Then, melt the butter in the microwave for about 15 seconds or so.

Use a brush to brush the butter all over the top of the chicken.  This is what gives the roasted chicken a nice golden brown color and makes the skin crisp.  Sprinkle more salt and pepper all over the top.  You can also rub it in a little if you want.  This angle shows you a little bit of how I tied the kitchen string.

Pop this bad boy in the oven for about an hour and a half.  Ina tells you to cook until “the juices run clean when you cut between the leg and the thigh.”  I’m a little more anal than that, so I use my insta-read thermometer and check it in a good meaty section until it gets to 165 degrees.  (Here’s a handy guide to all safe cooking temps from the FDA.)

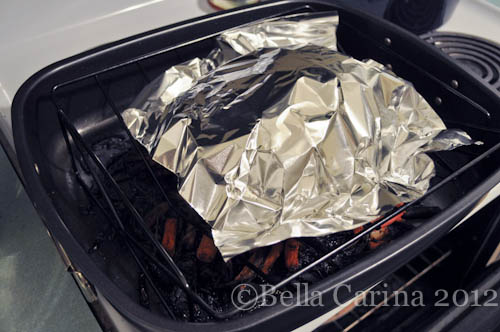
Once it’s done, take it out and cover it with a piece of foil.  The chicken needs to rest for about 20 minutes.  Can you see my fried onions and carrots along the edges?  Scorched black…so sad.  Let’s have a moment of silence for the slayed veggies, shall we?

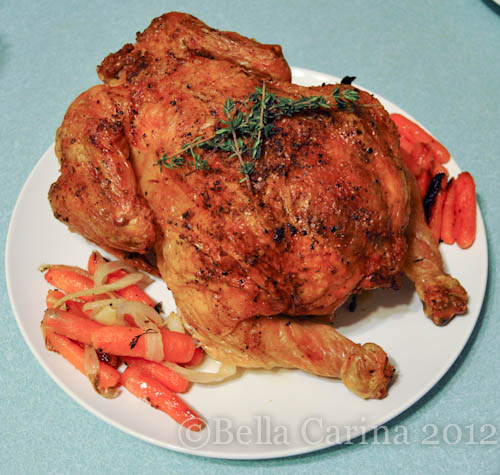
If I had a cool serving platter (which I don’t) then I would have transferred it to that, but I just used one of our plates.  I added some fresh thyme to the top as a garnish.  I used a pair of kitchen shears to snip the string.  I thought it came out looking pretty nice!

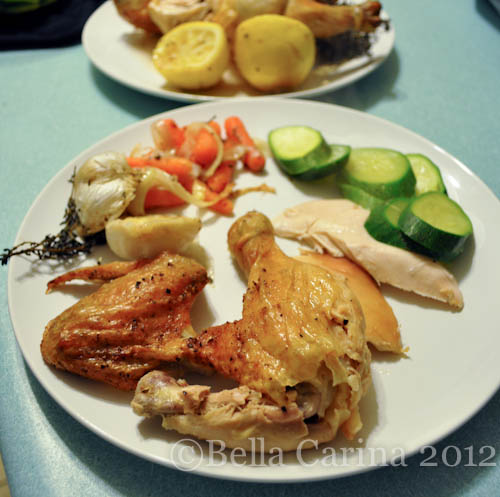
It’s actually easier to carve the chicken by turning it on its back, so you can easily access the breast.  Dane and I are good chicken sharers because he loves the dark meat and I love the white.  Match made it heaven, I tell ya.  Collective “awe” from the audience…  :)

I also cut up some zucchini and just popped it into a covered bowl in the microwave with a little water for about 5 minutes to add some color to the plate.  You can pull out the garlic and lemon from the chicken, too.  You can eat the garlic (which is now roasted) and it’s quite tasty…just be sure both of you eat it otherwise kissing could be a little awkward later. 😉  I like to squeeze some of the lemon over the top of my chicken to give it a little more lemon flavor, but honestly, this chicken is super tasty and juicy on its own.

This dish is something that really doesn’t take too much time to prepare (although you have to plan ahead for the long cooking time) and really can be a one dish meal especially if you add some more veggies to the pan.  AND, you’ll really impress your sweetheart!  This also makes for some good leftover chicken sandwiches the next day.

If you are having a group of people over, this is a very inexpensive and delicious way to feed them.  This roasting chicken was less than $6 at Trader Joe’s.  I would say this would serve between 4 and 5 people.  Especially if you add a good loaf of crusty bread and a salad to the meal.

After we gorged ourselves on chicken, veggies, bread, and a bottle of Bordeaux, we topped off the night with Molten Chocolate Cake and ice cream.  I’ll be back soon to share that with you!

Did you have a nice home cooked meal for Valentine’s Day?  Or did you have a romantic dinner for two at a restaurant?  Maybe a fun singles party with you friends?

Posted in Food | Tagged , , , , , | 2 Comments

Book Worm

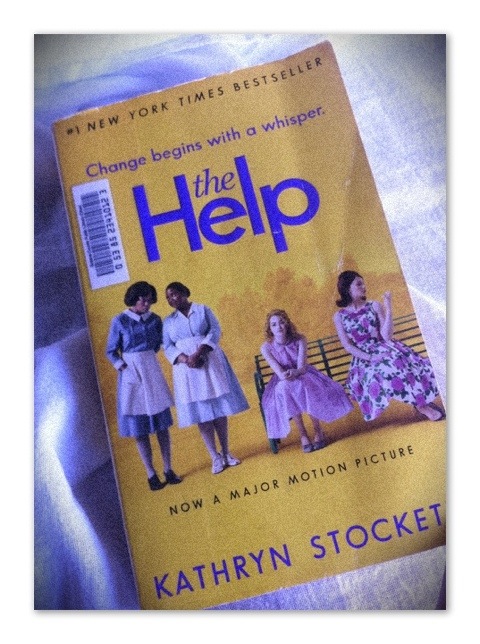
20120217-145634.jpgI’m lost in another book. This time, it’s still fiction, but The Help also incorporates a lot of history, which makes this history nerd super excited! For those of you that haven’t read this book yet (or seen the movie) its based in Jackson, Mississippi in the early ’60s (and yes, I just sang the infamous Janet & Judy song in my head to be sure I spelled that right. If you don’t know what I’m talking about, you probably aren’t a child of the 80s…and you’re unamerican. Ok, just kidding about that last part. 😉 google it…it’s worth it).

Anyway, I’m about halfway through and so far this book is awesome. :)

Anyone reading anything they love right now? I’m glad I’m starting to read more again…makes me feel smart. :). Maybe I’ll start a book club…who’s in?

Related Posts Plugin for WordPress, Blogger...
Posted in Life | Tagged , | 2 Comments